
I recently got a new projector and wanted to know how I can connect my MacBook Pro to it. After trying for a bit, I managed to successfully establish a connection and use my projector as a secondary screen (also mirrored display). And here’s how you can do it too.
This tutorial works with any projector and any mac device (including air, pro, etc). But FYI, I am using Vankyo V700W projector and MacBook Pro.
At a glance,
Method 1: Connecting a Macbook to a Projector using a Cable
STEP 1. Make sure the Macbook, as well as the projector, is turned ON
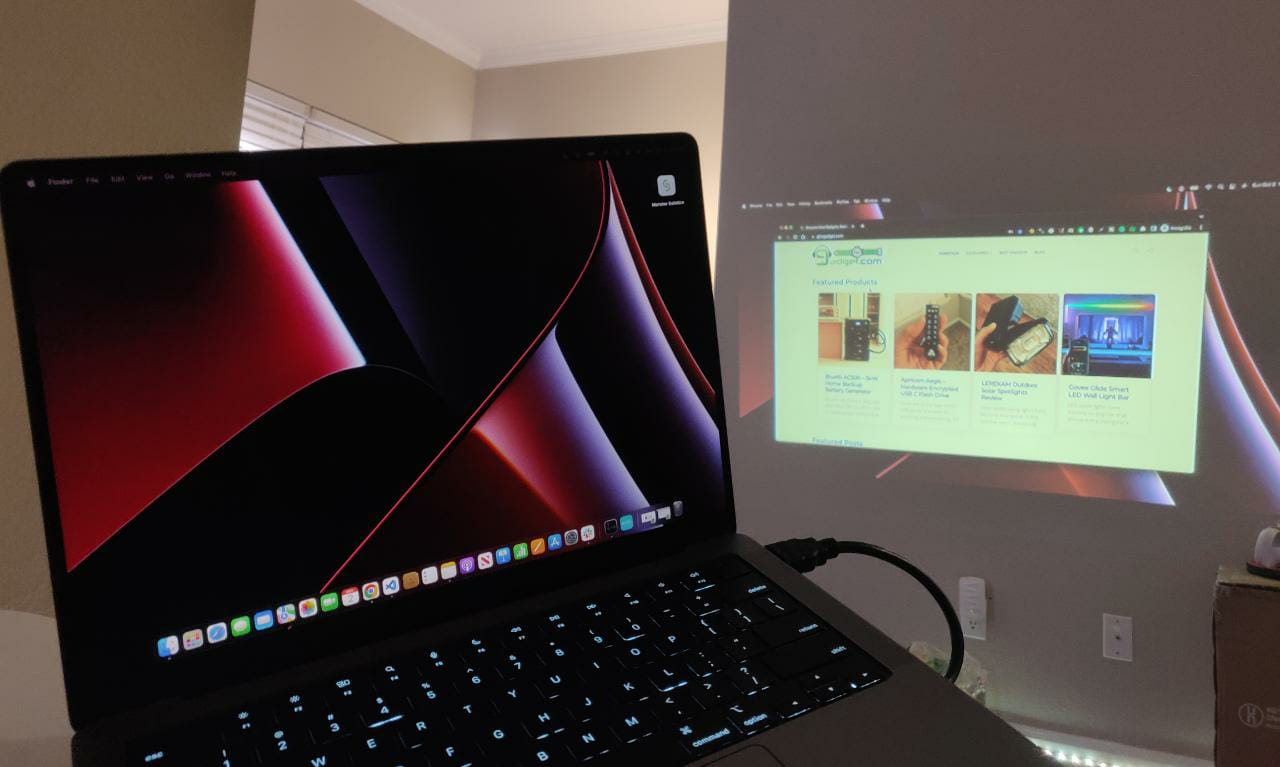
STEP 2. Connect the video cable
If your projector supports,
- USB-C input – Use USB-C to USB-C cable as it is easier and more convenient aaand MacBooks have multiple USB-C ports
- HDMI input – Most common, easy to connect, you just need an HDMI to HDMI cable or USB C to HDMI cable
- If the projector is very old, it may only have VGA input. In that case, you will require an HDMI to VGA adapter or a VGA to VGA cable + a USB-C hub.
Most projectors support HDMI input and some Apple Macbooks have an HDMI port. Many projectors come with an HDMI cable but if yours didn’t get an HDMI to HDMI cable. Once you have the cable in hand, connect one end of it to your Macbook’s HDMI port (typically on the right side of the laptop) and the other end to the projector. If the projector has more than one HDMI port, choose any.

If your Macbook does not have a HDMI port, it is better to get a USB-C hub for multipurpose use
Make sure the cable length is not too short because you might want to keep your Macbook on your table while your projector is somewhere near the couch. It is good to pick a longer HDMI cable like this one.
Note: If you are using other cables like USB-C or VGA, the process is the same as HDMI. Make sure the cable quality is good and the length is decent.
STEP 3. Select the Stream on your Projector
Some projectors are smart enough to auto switch to the HDMI port you just plugged into but some are not. In the latter case, you may go to the projector menu/settings area –> Source and select the HDMI port you just plugged into.

Voila, you should now be able to see your laptop’s screen mirrored to your projector
STEP 4. Change the display mode
Mac automatically detects the projector but it typically goes to mirrored mode. If you want to use the projector screen as an extended display, you can go to Display Preferences on your Mac device (keyboard shortcut option + F1), and go to Display Settings –> select the projector display. In the Use as option, you will get a dropdown of different modes. You may select extended display, mirror, or main display depending on your requirements.

I mostly use my projector as an extended display.
(Note: I the shortcut didn’t work, you can access Display Preferences by clicking on the apple icon on the top left corner of the screen, selecting System Preferences and selecting Displays)
STEP 5. If you don’t see your projector in the displays section, then your Mac is not automatically detecting the projector. In that case, in the Display Preferences section, hold option key on your keyboard and you’ll see Detect Display button. Click on it and see if your projector shows up. If not, there could be an issue with your cables, play around with it.

STEP 6. Enjoy!

If nothing works, try our next method.
Method 2: Connecting a Mac to a Projector Wirelessly (with or without Wi-Fi)
This is a very convenient method to connect your Mac to a projector but most of the time, it requires an add-on accessory. A wireless connection lets you keep your laptop anywhere in your house while being connected to your projector screen.
STEP 1. See if your projector supports casting over WiFi
For this, you may have to look at your projector’s user manual or go to the menu/source/multiscreen option on your projector and see if you find anything for Mac devices there (eg: Airplay)

My projector only supports this for Windows laptops but not Macs but I think the more expensive and advanced projectors do support WiFi casting for Macs.
STEP 2. If it does support WiFi casting for Macs, we shall use Macbook’s screen mirroring feature. Follow these
- Connect the projector and your MacBook to the same Wi-Fi network
- On your Mac, go to the Control Center on the top right corner
- Select Screen Mirroring (if you don’t have that option, it is likely that your Mac doesn’t support it. I’ve heard the older MacBooks don’t support mirroring)
- You should see your projector name in the Mirror or extend to section
- If so, select it and your screen should mirror itself to your projector in a few seconds
- If you don’t see any name, don’t fret, keep reading, let’s try a different method
STEP 2. If it does not support casting, use an add-on accessory
This method supports up to 4K resolution at 30fps
It could either be a simple WiFi casting device like Chromecast or a more advanced one like a wireless HDMI transceiver. With the HDMI transceiver method, you do not require any Wifi connection and its plug & play. This is extremely useful if you are outdoors or in an office or any public place.

Chromecast is the easiest and most popular option but if you want the connection to be more secure, and hassle-free, you may choose the wireless HDMI method.
STEP 3. If you choose the Chromecast method, follow these
- Once you have Chromecast in hand, plug it into your projector’s HDMI input port
- You will now have to set up Chromecast and connect it to your Wi-Fi network. Follow this official guide.
- On Mac, install Google Chrome if you don’t have it already. Connect to the same Wi-Fi network your Chromecast is connected to.
- In Google Chrome, on the top right corner, you can see three dots, click on it and go to cast option
- If your Chromecast is up and running, it should appear here, select it
- In the Cast to dropdown, you can select if you want to cast just the tab you are using or cast the entire desktop. You might want to select the latter. This video might be helpful for Chromecast-related questions.
- Voila!
STEP 4. If you choose the wireless HDMI method, follow these
Get a good wireless HDMI transceiver like this. Once you have it in your hand,
- Plug the transmitter section into the HDMI port of your Mac
- If your Macbook does not have an HDMI port, you will require a UDB-C to HDMI converter or the better option is to get a USB-C hub. It is very useful for other stuff too.
- Plug the receiver part into the HDMI port of your projector
- If the projector has multiple HDMI ports, pick any
- Some wireless projectors detect the Source automatically. If not, go to the Menu or Source option and choose the HDMI port you just used.
- Boom, connection successful

STEP 5. You can now choose to use the projector screen as a mirror display or an extended display
To see the steps, scroll up to the STEP 4 section of Method 1.
STEP 6. Enjoy!
Did you follow all of these methods and steps and still couldn’t get your Mac to connect to your projector? Let me know in the comment section and I will give my 100% to help you out.

Conclusion
There you have two simple ways of connecting your Mac device to a projector. The wired method is by far the easiest and the best because the connection is very stable and secure. But it is inconvenient. That is when the wireless method comes in. In the wireless method, I would first check if my projector supports WIFI casting for Macs. If yes, job done. If not, I would buy a Chromecast (or similar cast) or a wireless HDMI transceiver depending on my budget.